
Testing a Vue component part 2: the first test and snapshots
Welcome to part 2 of a series on how to test a Vue component.
Here's the table of contents of the series:
- Starting out with tests
- The first test and snapshot testing (you're here)
- Creating an instance of a component
- More tests and faking time
- Jest awesomeness and a skeleton to get started
Setting up the world
Let's take a further look at tabs.test.js. Near the top of the file you can see this line
beforeEach(() => {
The function that is passed to beforeEach will be run before each test. It's used to set up the 'world' you're testing in. It's equivalent to setUp method of PHPUnit if you're familiar with that.
Let's take a look what's inside beforeEach. That first thing that's happening there is this:
document.body.innerHTML = `
    <div id="app">
        <tabs>
            <tab name="First tab">
                First tab content
            </tab>
            <tab name="Second tab">
                Second tab content
            </tab>
            <tab name="Third tab">
                Third tab content
            </tab>
        </tabs>
    </div>
`;
Here we see one of Jest's cool features. It comes with jsdom built in. Jsdom simulates an entire DOM as if you were in a browser. In that code snippet before we're making sure that each test starts out with that piece of html in the dom.
The first test
Before reviewing the rest of beforeEach, let's take a look at the very first test. The purpose of this test is to assert that when the component is mounted the right html is being used. "Mounted" is Vue speak for "when the component has fully started up and has been rendered".
it('can mount tabs', async () => {
    await createVm();

    expect(document.body.innerHTML).toMatchSnapshot();
});
Even though it's just a few lines there are a lot of things going on, and I can imagine it's a bit confusing if you're not familiar with modern Javascript. Let's go through it in detail.
What happens here is that we first are creating an instance of our component (more on that later) and then assert that the html being displayed, so the value of document.body.innerHTML, is correct. That expect method is part of Jest itself. Jest contains various methods to assert things such as toEqual, toBeNull and much more. On this page in the Jest documentation you can see all available assertion methods.
Instead of asserting the contents of document.body.innerHTML against a big piece of html, we use toMatchSnapshot here. Let's find out what that method does.
Snapshot testing
The basic idea of snapshot testing is that you compare the output of your code against a file that's written on disk. That file is called a snapshot. If the output of your test matches up with the contents of that snapshot, it succeeds, otherwise, it fails. It's as simple as that.
In our project the test are stored in the __tests__/__snapshots__ directory. If you open up tabs.test.js.snap you'll see the html that is used in the can mount tabs tests.
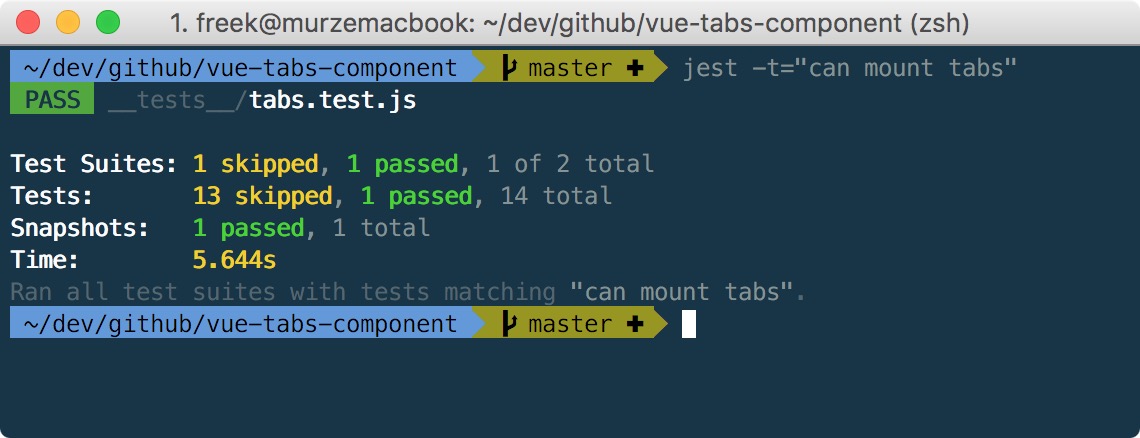
The cool thing is that you don't need to write those snapshots by hand. Jest can generate them for us. If you delete tabs.test.js.snap file and run the test again you might think that the can mount tabs will fail, but you're wrong. Let's see what happens. You can run the test separetly with this command
jest -t="can mount tabs"

You can see in the output of the command that there was one snapshot generated. The tabs.test.js.snap has been created. You could now verify in that snapshot if the content is equal to the output you were expecting. Run the test again and you'll see that it'll pass.
Let's try and make the test fail. We're going to cheat a little here and mimick changed output by just editing the current snapshot (in real life you would never edit the snapshot manually). If I changed the html in the snapshot a bit and run the test again, it fails.

If you want to know more about snapshot testing you can read this article my colleague Seb wrote about it, watch this video on how I used snapshot testing in PHP or just go over the relevant page in the Jest documentation.
We've learned some good things about that first test. But there's more. The story continues in part 3 of the series: Creating an instance of a component
What are your thoughts on "Testing a Vue component part 2: the first test and snapshots"?